CLAD Your VW Caddy Camper With Tongue & Groove Cladding!
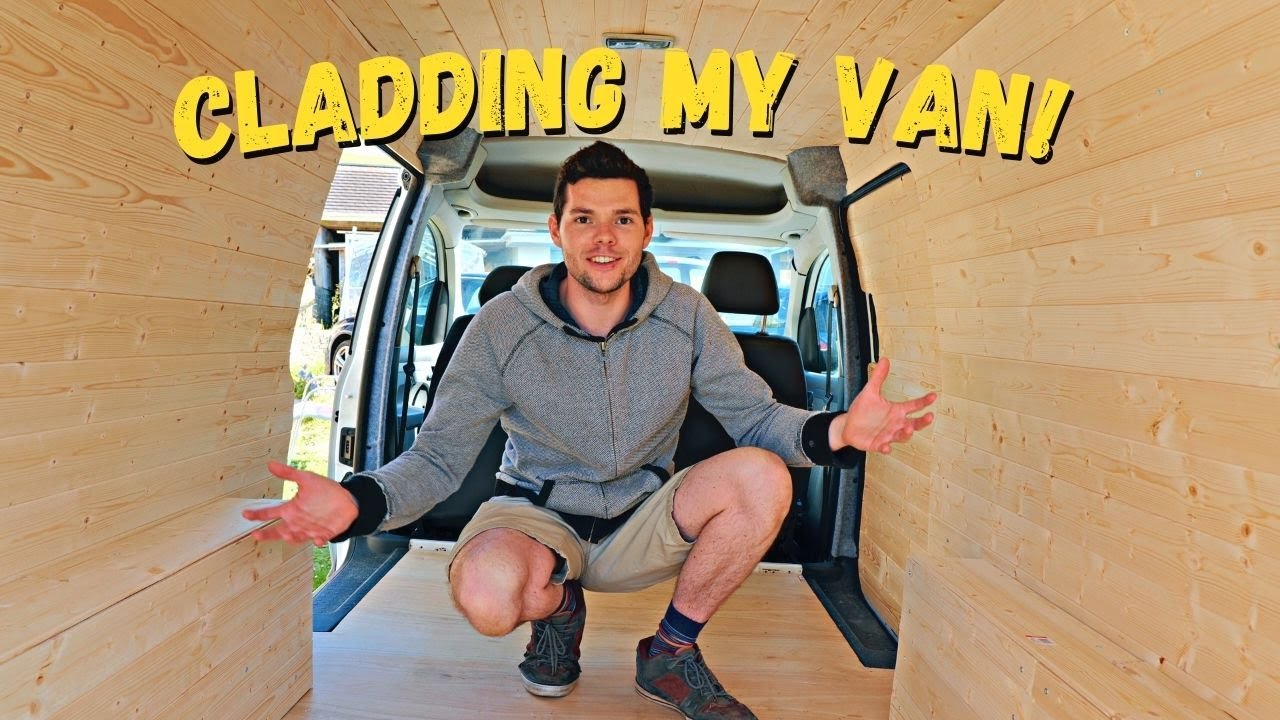
I’ll show you how to clad the inside of your van using tongue and groove cladding. I personally think this effect looks amazing inside a van and really makes it stand out, giving you that beachy vibe. I bought all the wood from Wickes and installed the tongue and groove cladding into my Volkswagen Caddy Maxi. The concept of tongue and groove cladding is that each board/plank has different edges on each side. One edge sticks out and the opposite each has a slot. This allows you to slot planks together getting a seamless finish.
Step 1 BUILD THE FRAME.
The first step you’ll want to do is build the frame for the cladding to attach to. I built this out of batons (12mm x32mm). I went for thinner batons so that they could bend to the curves of the van. I installed three batons down each side and four along the ceiling. To attach the batons to the van, I used 25mm metal easy drive self tapping screws, which I purchased from Screwfix.
Step 2 THE CELING.
Once you’ve built the frame. The easiest step to do next is the ceiling. You want to measure each piece of cladding, cut it to shape/length and then screw this into the batons on the ceiling. Secure each plank/board by using wood screws and slot each board into the previous board.
Step 3 THE WALLS.
To attach the cladding to walls, again cut each board to shape and length. Place each piece on top of the previous piece and work your way up the way. Don’t fix the pieces into place at this stage. This allows you room to make an changes before it’s secured down. Once you’re happy with all the measurement, take off the boards one by one and then re-install the cladding boards but this time attach them to the wooden beams underneath, again with wood screws.
Step 4 THE DOORS.
To attach the cladding to the two rear barn doors and two side sliding doors, you can use the old ply lining kit. If you don’t have plywood on these doors, you can buy these from eBay or make your own. Lay the plywood panels on the ground and layer up the cladding on top. Once you have slotted enough cladding boards to cover the plywood panel, slide the panel out from underneath the cladding boards. Place the plywood panel on top of the cladding and draw around the panel. This will give you the exact shape for the cladding to cover the panels on the doors. Then you’ll want to cut the cladding boards to shape/length. To attach the cladding to the plywood panels, use some wood glue and wood screws. You can now re-attach the panels to the doors using the 25mm metal self tapping screws.
Step 5 FINISH,
you can now finish your cladding however you like. You can either leave it, paint it, or varnish it.
If you now want to learn how to add a curtain to separate the back of the van and the front. Head to my blog post called “How To Install A Blackout Cab Curtain”.
Are you thinking about converting a van into a camper? Why not check out the my full video playlist on YouTube for this white Volkswagen caddy maxi. In the series I take an old rusty builders van and convert it into a sleek and clean camper ready for the summer.
Head to my YouTube channel “Wills Van Adventures” and learn more!
This post may contain affiliate links which means I may receive a commission for purchases made through links. Learn more on my Private Policy page.