How to convert your Volkswagen Caddy van into a campervan!
Here you will discover the process of converting your empty Volkswagen caddy van into your dream camper!
Let’s get you started with your Volkswagen caddy van conversion. Back in 2020 I embarked on the challenge of converting my first van into a campervan. I purchased a Volkswagen caddy at the start of the year and the main conversion was completed during the global COVID-19 pandemic by myself and my partner. After this first conversion I found a love for converting vans and this led me to converting two more! Converting our campervan has been one of the most rewarding experience of our lives! To help save you time (and stress), here’s my step-by-step beginners guide.
*To be clear, this is the rough step-by-step process that we followed with our van. Depending on your own chosen layout, and van, your steps will be different. But this is a pretty good idea at what to expect.*
A few key points to remember!
- Everything can be learned online – I’ve filmed many ‘how to’ videos so you can follow along. Check out my YouTube channel here.
- You will need some professional help – Installing electrics & gas is best done by a qualified professional.
- PLAN! – Watch, read and learn as much as possible before beginning the build and then create a very detailed plan for your desired van. Many things will be worked out along the way, but the more in-depth your plan to begin with, the easier your build will be.


STEP 1: How much does a Volkswagen caddy van conversion cost?
Most people say that converting a van into a camper costs thousands of pounds. But it really doesn’t have to. All three of my conversions have cost around £500.
I understand that some people like to add more items into their conversions that will increase the cost, such as a kitchen and/or bathroom with electrics, gas and running water. Likewise, if you have a bigger van then the cost will go up.
Just like anything in life, you can spend more money on the fancy stuff. But if you’re like me and only have a small budget to work with and are willing to do the work yourself. You can convert a van into a campervan for under £1000.
In the end, it cost me roughly around £8454.09 to convert our campervan in the UK.
This included everything:
- The price of the van (£7,995).
- Any vehicle servicing.
- Tools (we had nothing).
- All parts & equipment used.

Step 2: Find your van
Before you can even convert a van into a campervan, you need to actually FIND a suitable van!
If money isn’t an issue, then that helps as you can spend more money on the van itself, and getting a newer van with less milage and fewer mechanical issues.
The three vans I have owned and converted have all been Volkswagen caddy maxis. Being that the maxi is the long wheel base version.
Two of the vans were ex-British gas vans, meaning they were the c20 and c20+ startline models. One was just a bog-standard model.
Here’s what I looked for & why when buying the vans:
- Straight bodywork and no rust- it can be very expensive fixing big dents and rust, especially if they are structural.
- Under 100,000 miles on the clock – Normally the less miles on the clock mean the better the condition of the van, although this won’t always be the case. This will also help the value stay strong when you re-sell the van in the future.
- A good service history. – Having service history shows you exactly what the van has been through and whether it has been looked after. It can help you determine what you may need to fix or replace in the future. Don’t be afraid to ask questions when you are enquiring about a potential project.
Where can you find a van to convert in the UK?
1. Autotrader is my first go to.
They are by far the biggest used van site and have some really helpful filtering tools. There seem to be loads of vans posted on Autotrader so I always head there first.
2. Gumtree
Dozens of vans get listed on here every day all across the country, and many people use this and not Auto Trader when selling. However, these typically tend to be private sellers and less trade sellers.
3. Facebook
Facebook can be great when buying used vans. Many people list vans on Facebook and not on other sites. You can always join groups targeted for the brand and model of van you are looking for. For example, you can join ‘Volkswagen crafter owners group’. In these groups many people share their experiences and also vans for sale. These also offer you the opportunity to ask questions to those who may already own (or have owned) a converted van.
4. Local Garages
Local garages always have vans for sale. However, you will likely pay more from a garage then from a private seller. A great benefit from garages is that you can request to test drive a van, which gives you a great opportunity to check how it drives and have a closer inspection.
A Few Final Tips When Buying Your Van
- When viewing any vans, if you can take someone with you who knows exactly what to look for in terms of mechanical problems, this can be handy.
- If you can’t take someone with you who knows mechanics. You can use services like click mechanic.
- Check if the sale price includes VAT or not (this can mean an extra 20% on top of the list price).
- Ensure you can test drive the van properly for at least 30minues to ensure the engine gets up to temperature.
- Ask to see a full-service history and find out when the last MOT was.
- Check the MOT history on the government’s website.
- Vans seem to sell super-fast. But don’t rush into a sale if it doesn’t feel right. Another van will always be available in the future.
Step 3: Arrange Insurance
Sort insurance BEFORE starting your conversion. I’m not an expert on insurance but it is super important that you get the correct cover for your van and conversion. The availability of insurance will depend on a number of different factors (potential modifications, engine size, mileage and age)
It’s worth spending a good day or so calling up all possible insurers and carefully comparing their policies before settling on your final choice.
When getting my van insurance, I used either A Plan or Adrian Flux. For my vans, I ended up paying around £600 a year. However, there are many factors that will affect the price.
Here’s a few different insurance providers to get your search started;
Step 4: Buy as much equipment as possible!
There is nothing more annoying then planning your weekend to work on your van and then finding out you don’t have the right tools or materials to get started or carry on. This all comes back to the planning stages but it is best to buy all your materials and equipment before you get started with each stage.
Having to wait for things to be delivered and making countless trips to Screwfix and Wickes can be very annoying. Trust me, I know from experience.
Where To Buy Equipment For Your Van Conversion:
- Wickes and screw fix are my favourite places to shop for building materials and tools. If you have anyone in your family who has an account with either of these stores you can use their account to get discounts.
Amazon – Is absolutely amazing when it comes to buying most stuff for your van. On this website, I have added links to many items that you may need that are supplied by amazon. If you buy through some of the links then I will get a small commission at no added expense to you, thank you in advance!)
Join our Volkswagen Caddy Campers Facebook group!
Step 5: Cleaning
Now that you have bought your van the first stage will be to create an empty shell. You can do this really easily by clearing out any racking or ply lining kits in the van.
Once this is done, I like to give the van a full sweep and hoover. The next step I do is to touch up any rust marks or scratches using hammarite paint to ensure there will be no further rusting in the future.
Step 6: Electrics
Before you go any further, it’s now time to get your electrical setup installed if this is something you feel is essential for your conversion, this is not a requirement. For this, you need 2 things:
- A qualified and trusted auto electrician who knows what they are doing. I would recommend getting multiple quotes so you don’t get ripped off.
- All of the electrical components you want to install and a diagram of where they will be. Again, do your research and check reviews from customers.
The electrical stage of your van conversion will require a lot of time and planning. You may want to just install lights, or you may want to go further and install a leisure battery to run multiple devices.
If you own an ex British gas Volkswagen caddy like myself or any ex commercial van. They typically come with more electrics from the factory compared to other vans on the market. For example, a ex British gas caddy comes complete with a battery isolator, LED lights and multiple 12 volt sockets.
Having a battery isolator is great as it means your battery will cut out before it loses all of its charge. Therefore, meaning you won’t need a jump start if you’ve left your internal lights on all night.
Having all these extra 12 volts sockets and a battery isolator, I opted not to install more electrics into the van and instead opted for a portable power station. Which leads me onto my next point.
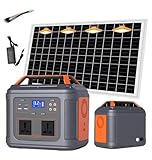
Portable PowerStation Solution
If you decide not to not to install electrics, then a portable power station may be a better choice. There are many portable power stations on the market and they are amazing!
You can get many sizes from 250watts all the way up to 5,000 watts. They have multiple charging ports, from USB, 3 point plugs, 12 volt sockets and wireless charging. This means you can charge multiple devices at once.
And when it comes to charging them up, you can either do this via the through mains power, via solar power (with the included panel) or via your vans 12 volts outlet while driving.
What this means is you can have a straightforward power solution for your van, up and running in very little time at all.
Allowing you to power all the devices you need, without needing to spend thousands on all the components listed above and in our electric guide.
I prefer this option as it’s meant when I’ve switched vans, I have kept my power solution. It also means that I can use the power station in other situations like camping or just around the house when needed.

Step 7: Insulate and sound deaden your Volkswagen caddy van conversion
This is a crucial part of your van build; regardless of where you plan on travelling in your van. Many vans are very basic in terms of interior design from factory. This means that many are very loud when on the road. The first stage I would recommend would be to add some sound deadening.
I would highly recommend using sound deadening sheets as it really does make a massive difference to the sound of your van. It’s super easy to apply. The sheets have a contact adhesive on one side which you simply stick to the desired panels. Once this is done the sound deadening sheets remove some of the rattling and road noise from your van. I would particularly recommend doing this in the front cab (if possible) as that is where you’ll spend a lot of time when driving.
A well insulated van allows you to stay warm in cold climates, and also cooler in hot climates. The insulation I’ve used for all of my vans has been the recycled bottle plastic from B&Q. I like using this material as is better for the environment, it doesn’t hold moisture so won’t go mouldy and it also doesn’t itch your skin when working with it.
In order to fix the insulation to the walls/roof of the van I like to either use spray adhesive or aluminium tape.
Once you have completed the insulation stage the next stage will be to create a vapour barrier. A vapour barrier is one that stops moisture settling on the metal of the van from the inside.
This is done by using a material called thermowrap or thermos van liner. This material doesn’t really have any insulation properties but it does help to reflect heat which is an added bonus. But the main aim of the thermowrap is to create the vapour barrier which keeps your van nice and dry despite the condensation.
This means that, if installed correctly, none of the condensation should make its way through to the metal work of the van, thus meaning you won’t have any rusting in the long run.

- Bedding Comfort Store provides Ployester insulation for Transporter Camper Van Floor ROOF in both new and renovated projects. And Most Importantly it is Non Allergic, Itch free.
- Material: Thermal Construction Insulation is made of recycled Polyester and the amount of recycled materials is 90%.
- Specifications: These Transporter Camper Van Insulation’s Length: 8 meter, Width: 370 mm & Thickness: 110 mm. Coverage: 2.96 m² and R-value: 2.29 m² K/W.
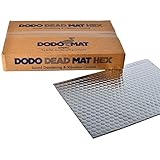
- 20 Sheet Sound Deadening Pack with high grade butyl construction and Hex embossed aluminium
- High quality vehicle sound deadening designed in the UK & manufactured in Europe
- The unique Dodo specification chemistry of the synthetic butyl core effectively deadens panel vibration without the excessive bulk of competitor products
Step 8: Carpet lining
Once you have completed insulating your van the next step is to decide what you are going to do with the walls. Are you going to have plywood panels, cladding or carpeting lining. Or maybe a mix!

Step 9: Build the frame
At this stage of turning a van into a camper, you want to think about installing the structural foundation for everything else you build onto. This is usually in the form of batons to form structures which you then use to secure cladding/furniture onto. When screwing anything into the metal of my van I used self tapping metal screws.
It helps for you to have an exact idea of where everything in your van will be such as;
- Cupboards and storage
- The bed or other furniture including sofas/hammocks
- Work surfaces
- Lights
- Controls/switches
This “stud work” will be behind the scenes but will be what all of these things are built onto.
If in doubt, the best thing to do is to add in as many support beams as possible, as when you clad onto them, they will be solid.
Once you have installed the batons, I would highly recommend doing the carpeting next. The carpet I used was 4 way stretch carpet. This material is amazing to work with and is simply stuck on using the spray contact adhesive.
I decided to carpet the rear archway of my van and other sections of the van to make it cozier. I also added carpet to sections that would be underneath the cladding so that it would create a nicer finish and hide the bare metal of the van beneath the cladding. Thus, meaning your eye wouldn’t catch the metal and instead would be met with a warmer finish. Remember that little things make a big difference.
Step 10: How to fit the cladding inside your van
Once you have got your frame installed, the next step is to clad the walls. The cladding I used for the walls was from Wickes. I chose the wood from Wickes as it was a tongue and groove design and also thin, meaning it bends to the curves of the van. There are many different types/designs or cladding which all give different vibes to the interior of your van.
I would highly recommend installing the cladding first and then painting/varnishing it afterwards. Sliding together pieces of cladding that have already been varnished is an absolute nightmare! The tongues get thicker, the grooves get narrower and the wood bows slightly.
Step 1 – BUILD THE FRAME.
The first step you’ll want to do is build the frame for the cladding to attach to. I built this out of wooden batons (12mm x32mm). I went for thinner batons so that they could bend to the curves of the van. I installed three batons down each side and four along the ceiling. To attach the batons to the van, I used 25mm metal easy drive self tapping screws, which I purchased from Screwfix.
Step 2 – THE CELING.
Once you’ve built the frame. The easiest step to do next is the ceiling. You want to measure each piece of cladding, cut it to shape/length and then screw this into the batons on the ceiling. Secure each plank/board by using wood screws and slot each board into the previous board.
Step 3 – THE WALLS.
To attach the cladding to walls, again cut each board to shape and length. Place each piece on top of the previous piece and work your way up the way. Don’t fix the pieces into place at this stage. This allows you room to make an changes before it’s secured down. Once you’re happy with all the measurement, take off the boards one by one and then re-install the cladding boards but this time attach them to the wooden beams underneath, again with wood screws.
Step 4 – THE DOORS.
To attach the cladding to the two rear barn doors and two side sliding doors, you can use the old ply lining kit. If you don’t have plywood on these doors, you can buy these from eBay or make your own. Lay the plywood panels on the ground and layer up the cladding on top. Once you have slotted enough cladding boards to cover the plywood panel, slide the panel out from underneath the cladding boards. Place the plywood panel on top of the cladding and draw around the panel. This will give you the exact shape for the cladding to cover the panels on the doors. Then you’ll want to cut the cladding boards to shape/length. To attach the cladding to the plywood panels, use some wood glue and wood screws. You can now re-attach the panels to the doors using the 25mm metal self tapping screws.
This means that if we need to get to the mechanics inside of the door in the future, then we can simply take the screws out and remove the necessary piece.
The only thing I will say, is that this adds a fair bit of weight to the doors, and you can definitely feel it on the sliding doors. In retrospect, I would have cladded 3mm ply instead as it would have reduced the weight slightly and still been as strong.
Step 5 – FINISH
You can now finish your cladding however you like. You can either leave it, paint it, or varnish it.
Step 11: Lay The Floor
I only insulation I have used on my van flooring is the sound deadening combined with the thermowrap. So therefore, this doesn’t really hold any insulation properties. I haven’t used insulation on the floor as I have never felt the van needed any. They always seem to be warm enough and this also saves a bit of money and time.
But it can be a good idea to lay insulation on the floor. A good method is to basically lay Celotex (or Kingspan) insulation boards on the floor and then cover them in plywood.
For the main floor I would recommend using 10mm or 12mm plywood.
Finished Flooring
So once the plywood is cut to shape and installed on the floor, you’ll want to finish off the flooring. Some people use vinyl for their floors, along with many other materials. I however, opted to go for laminated floor boards. I chose this approach as it can be cheaper, the boards are hard wearing and there are lots of colours/designs to choose from.
Quick tip – I like to do the flooring almost at the end of the build. This way it keeps the floor in a good condition. There would be nothing worst than installing your floor only to drop tools onto it and damage it down the line.
For a Volkswagen caddy maxi, you’ll need 2 packs of 12mm laminate flooring. My advice is to cut the floor to shape and then once this is complete you can take it back up and then stick it down permanently with wood glue.
Step 12: Build The Bed And Furniture
Here’s where the build gets exciting, because it’s time to start building the things you will actually use in your campervan conversion!
This can include things like:
- Kitchen – with a sink, space for oven and cupboards
- Shower/sink
- Space for the fridge
- Dining area/table/seating
- A bed/hammock
How to build a slide out bed
This isn’t a ‘how to’ guide but a time-lapse of me building my first slide out bed. As it is simple to build a bed, you can follow along this video to build your own.
Step 13: Add The Finishing Touches
Once you get this far, it should just be a case of putting in some finishing touches to make your van more homely. This is entirely personal just like the rest of the build and up to the finished look you want to achieve; but here’s some links to a few things I decided to add to my van:
- Fairy lights
- Blankets/Throws
- Aesthetic storage including baskets and trays
- Plants
- Wall art/prints/paintings
- Don’t forget essentials like first aid kits, emergency supply kits with water/biscuits/torch.
Lanyard Hack
In the video below I’ll show you how to install a pullcord/lanyard enabling you to open your van’s back door(s) from the inside. Many modern vans don’t have the ability to open the back barn doors from the inside. Therefore you can only open the door(s) from the outside which can be a pain if it’s raining or the ground outside is muddy. By fitting a pullcord or a lanyard to the doors locking mechanism, you can open the doors from the inside with ease.
To do this you’ll need a lanyard/pullcord, 2x cable ties and cable tie cutters (scissors will do).
Blackout Cab Curtain
Fitting curtains to the rear barn doors is a great addition I’d highly recommend.
These are the curtains designed for the rear barn doors, however, the process will be similar on every van-X curtain and every van. These are great curtains and I would highly recommend buying them for your van!
You will need the following tools:
• Drill
• Phillips Screwdriver
• Tape Measure
• Hacksaw.
INSTRUCTIONS From Van-X
1. Carefully unpack the curtains – Please do not use a knife or a sharp blade.
2. Measure the window frame and cut the bottom rail accordingly. The rails are slightly flexible and can be bent to fit the contour/corners of the window if required but please allow for this in your measurements. Our Plastic Bending tool can help you with this. Simply screw the tool down to a piece of wood or a workbench. Then feed the rail through and gently pull to bend. Repeat the process for the top rail. Please Note: Window sizes can vary so please make sure you measure for the top and the bottom rails individually. THE FLAT RAILS MUST FIT, JUST ABOVE/BELOW THE GLASS, WITHIN THE WINDOW FRAMES.
3. Decide where you would like your screws to go and drill the holes accordingly. These holes need to be made in the widest channel of the rail. Now fix your screws into the rails and the metal frame. We recommend that you use 4-5 screws per rail. Please note: When attaching the rails to the metal frame please make sure the edge with the widest channel is facing the window.
4. FOR VOLKSWAGEN TRANSPORTER T4 MODELS ONLY (BARN DOOR WINDOWS), Please make sure that the widest channel is positioned away from the window for the bottom rail. This is simply to allow some space when carefully removing a notch for the door lock. (If required, carefully cut this out with a pair of snips/ hacksaw.) – Please refer to the image below to see an example how it should fit around the lock.
5. You are now ready to attach your curtains. We recommend that you slide 4-5 hooks along your top rail making sure that the poppers are on the outer side of the material. You may want to attach one end cap to each rail at this point to stop the curtain sliding out.
6. Gently stretch the curtain and fit the 4 or 5 opposite hooks to the bottom rail. It is easier if you have someone to help you by holding the top end of the curtain in place (These van-x curtains are designed to stretch).
7. Continue the process until all the hooks are fitted through the rail. (The result of the curtain hooks all slid inside both rails can be seen in the image below.)
8. At this point, make sure that you have fitted all of the end caps to the rails.
9. Now that the curtains are fitted, look at both the ends of the curtain with the poppers facing the outer edges as these need to be attached to the side of the window frame. To fit the 8 male poppers please fix where necessary with a rivet or the last remaining 8 screws included in this kit. (Please view the image below for an example how the male poppers at the side of the window frame align with the female popper off the curtains.)
10. There are 2 tie-backs supplied within the kit, these are used to attach around the curtains so they stay in place on their own.
11. Your new Van-X Curtains are now ready!
Exterior Changes
At this point you may want to change the exterior look of your van if you haven’t already. This depends on what vibe you are going for. Some examples could include;
- Tinted windows
- Wind deflectors
- Tinted headlights
- Lowered
- Add/remove plastic protective strips
- Paint/texturize bumpers
- Add rails below the doors
- Paint brake calipers

Paint steel wheels
If you don’t want to fork out a fortune for alloy wheels or prefer that more swamper style look. Then painting your steel wheels is a great way to not only protect your wheels but also dramatically change the look of you van.
Your Finished Van!
Well done! Your van should now be finished! However, we all know the conversion will never be finished haha.
Step 14: Submit It To The DVLA
Once your van conversion is finished you may need to submit it to the DVLA depending on your build.
DVLA Requirements For Reclassifying As A Motorhome
If you’re converting a van into a campervan, it’s important that you check the DVLAs official guidelines as these do change over time.
It’s worth pointing out here that the vast majority of requests for reclassification are being denied. I have seen this countless times in groups on Facebook. It seems that it all comes down to one simple fact … your van must look like a campervan in traffic in order to be properly reclassified. Basically, you probably don’t need to reclassify your van as it shouldn’t be an issue as long as you are clear and upfront with your insurers.
How To Convert A Van Into A Campervan: Final Thoughts
Thank you for reading through my van conversion guide. I hope it has helped you or will help you with your own van conversion. Remember, you can find lots of helpful videos on my YouTube channel.
Measure twice and cut once! This is my biggest tip that I have learnt the hard way!
You camper build will be easier and quicker if you have a friend on hand to help you with various stages.
If you have any questions that you couldn’t find answers to above then please drop me a message via the contact page.
Disclaimer: Fully research your destination prior to travel, or any products prior to purchase. We can accept no responsibility for anything you experience as a result of the information found on this website. Some posts may contain affiliate links, which means we receive a small commission for some purchases, at no additional expense to you. Read more here.
Last update on 2026-07-11 / Affiliate links / Images from Amazon Product Advertising API